

SQL Servers come in various flavors, Microsoft SQL Server, PostgreSQL, MySQL etc. Over the years, many organizations tend to accumulate a hybrid IT architecture. This hybrid architecture might mean having to support more than one type of database. In the extreme case, you might be an organization that has every type of database on premise.
Let’s say, you are that extreme case, not only are you and your DBA’s and system support folk having to manage, maintain and run these different databases on premise, managing backups, recovery, security, patching etc etc..you are also be paying heavy licensing (on a yearly increasing basis) to the vendor (Ex: Microsoft).
Fortunately, Google platform has a service: Cloud SQL – Cloud SQL is not just a different type of database created by Google. Cloud SQL is a SQL Platform that enables you to launch any kind of database in Google cloud including Microsoft SQL Server, MySQL, PostgreSQL. This way, you need to change nothing about your database and you can very easily connect to it using your favorite tools locally just like you normally would. The benefits of cost savings, reduced maintenance and management and virtually non existent performance problems in a managed database are yours to keep.
Many IT shops are currently hosting their data / database systems in co-location centers, the biggest difference when it comes to cloud is not only the heavy licensing you are currently burdened with but also that your systems need to be managed actively.
Moving to Cloud SQL, you can simply choose the image you want and launch your instance in the cloud and migrate your database to Google cloud platform using the steps we’ve outlined below.
Note that, we have used the terms as follows : GCP console – Google cloud platform console.
You can try the below steps by quickly signing up for an almost free Google cloud account, if you give us a call, we might be able to help you receive upto $500 as free credits for trying out the cloud through our partner programs available only to Google cloud select partner like Acumen Velocity.
Below are the steps to move your Microsoft SQL Server to Google cloud and still retain complete control knowing that the management of that database is now not your headache and you are assured of paying for licensing cost and hardware for only the duration of use and not burdened with heavy yearly licensing fees.
If you have any questions or need assistance, feel free to contact us. Here are the steps:
Create a Microsoft SQL Server Instance in Google Cloud Platform
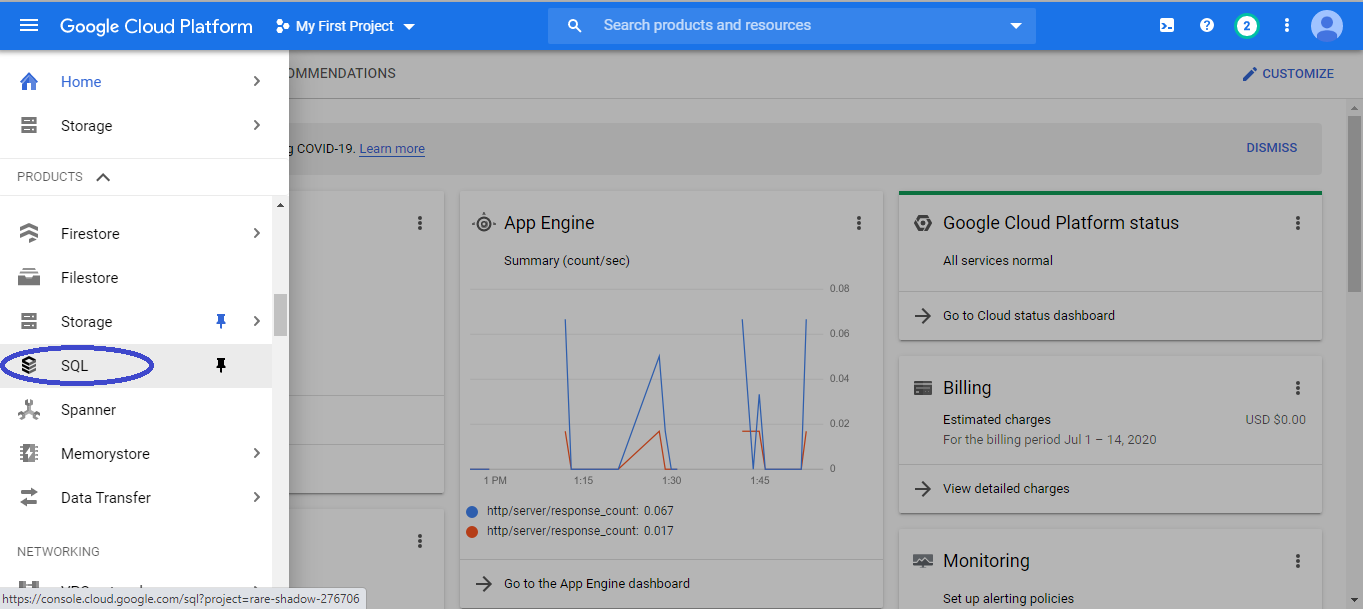
(1) Login to GCP console and navigate to SQL option on the left side menu.
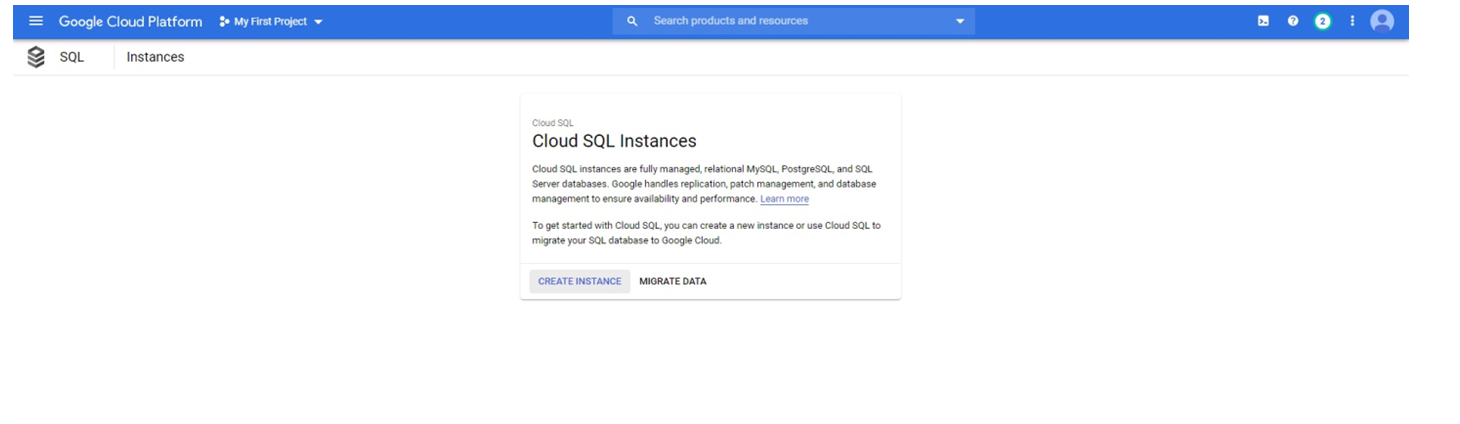
(2) Start creating a new instance of Cloud SQL by clicking on “CREATE INSTANCE” button.
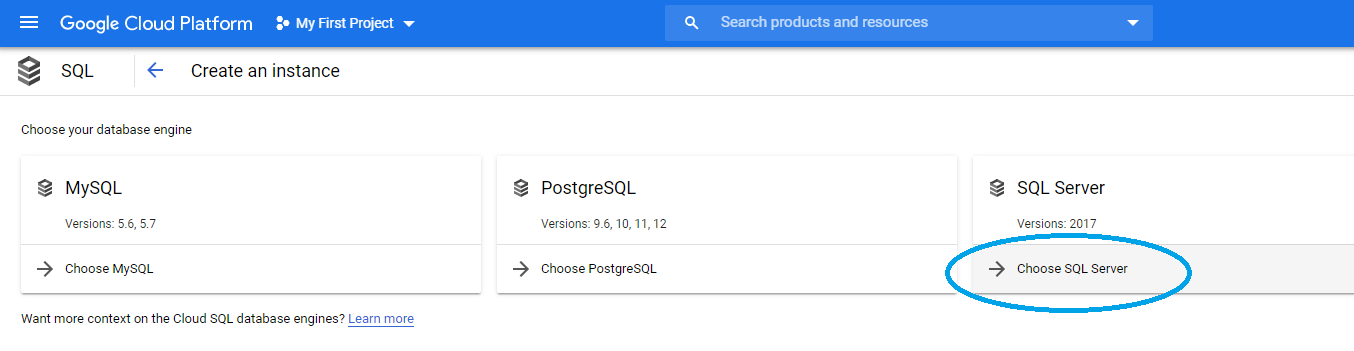
(3) Choose “SQL Server” option by clicking on the option “Choose SQL Server”.
(4) Enter SQL instance ID (acumensqlserverinst – in this example) as per the rules provided on the page below.
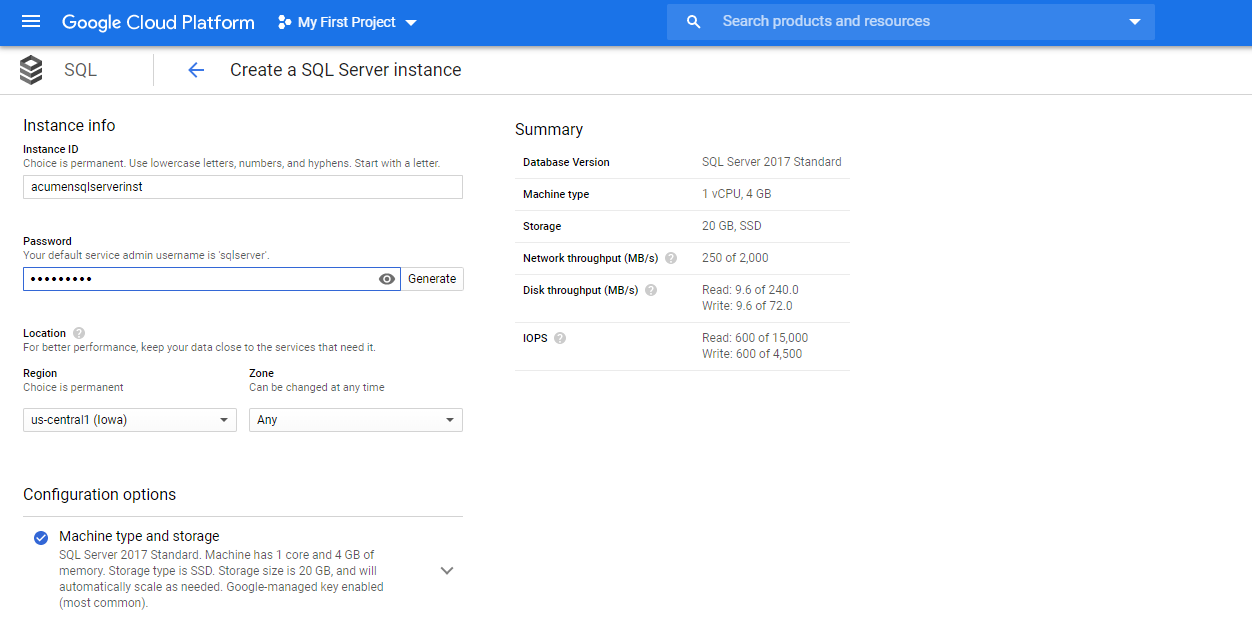
(5) Set the password (Ex. “root”) for accessing the instance.
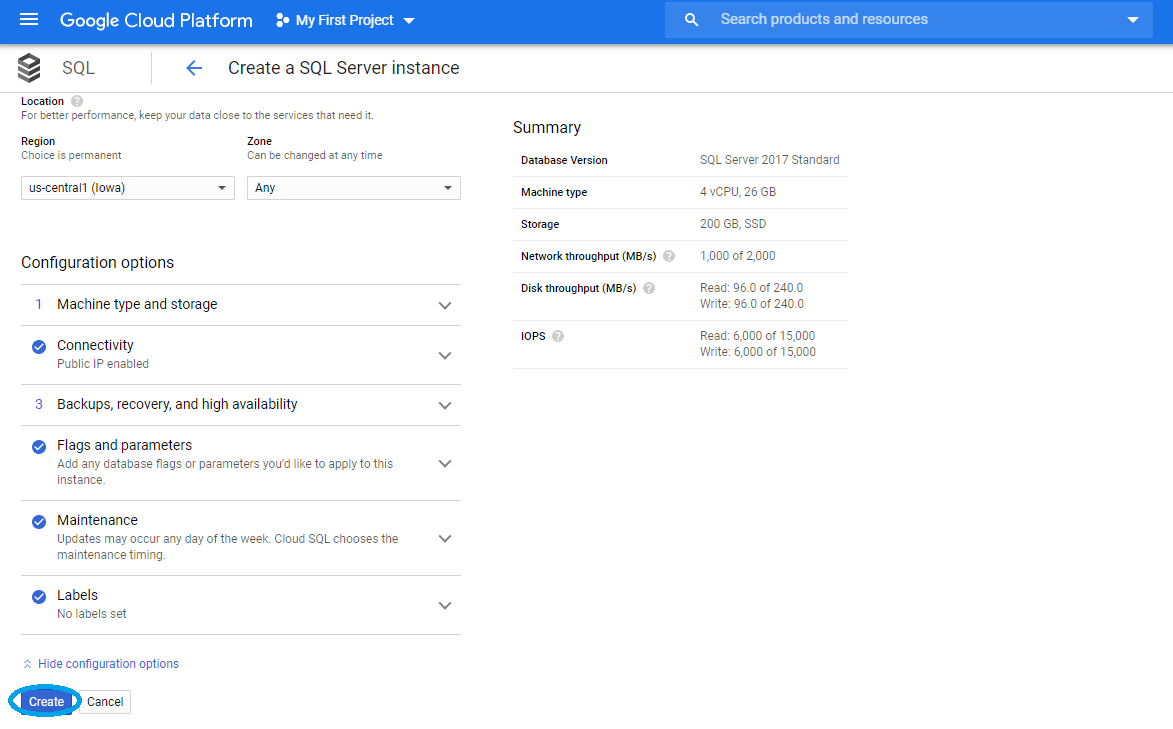
(6) Select Region (us-central1) & Zone (any). This instance will be created in the US, and we’ll leave the zone set to “any” so Cloud SQL can choose for us.
(7) Select Database Version and Edition as “SQL Server 2017 Standard” from the list.
(8) Select Machine Type as “High Memory” from the list and select CPU “4vCPU, 26 GB” as shown below.
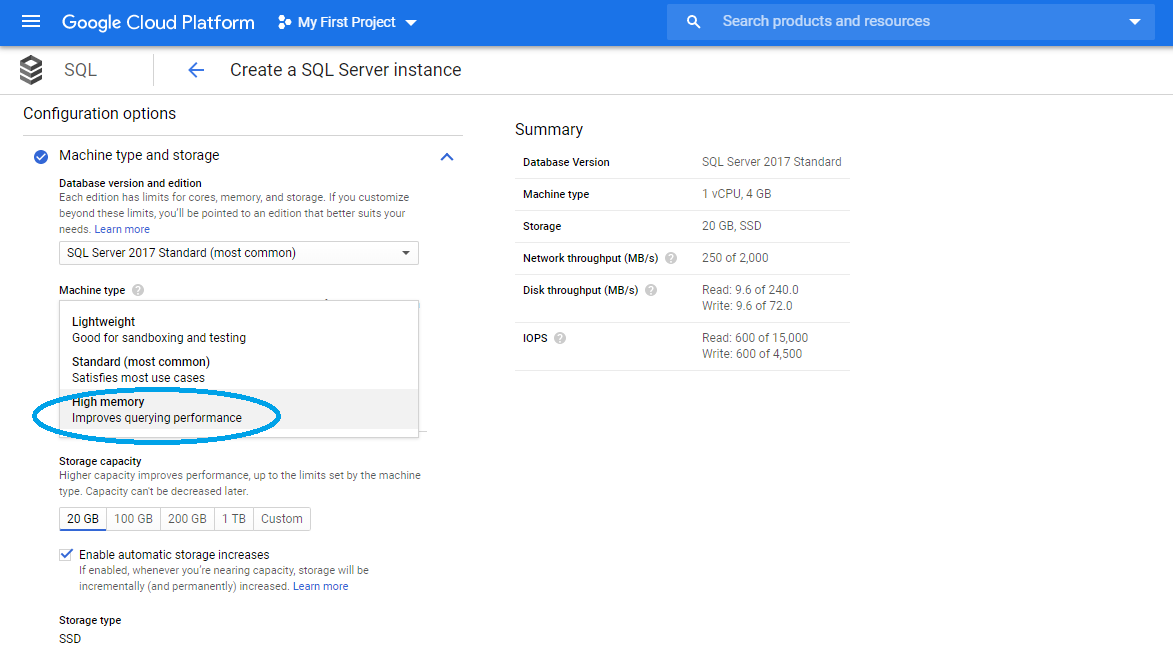
Maximizing memory is a good choice for SQL Server because it can take advantage of the extra memory for performance.
That said, don’t worry too much about initial sizing. You can scale the instance up or down later.
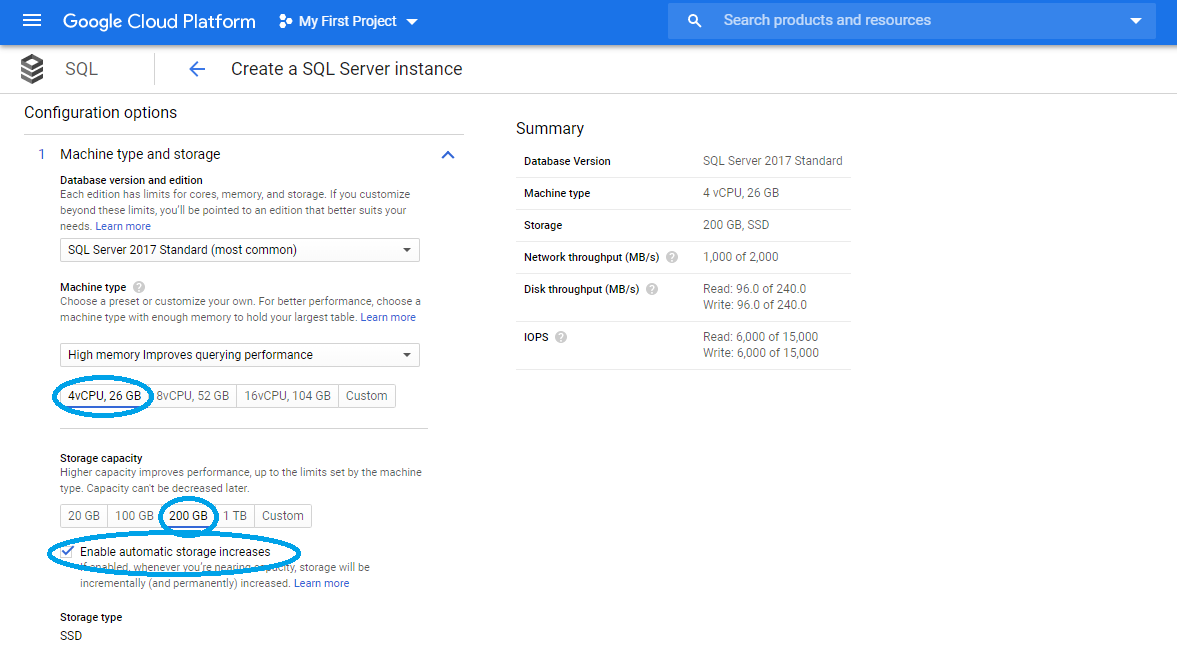
(9) Select Storage Capacity as 200 GB. Because, increasing disk capacity also increases performance. Check out the performance calculator on the right.
As we add capacity, our disk performance increases, which allows our database to process more operations per second.
(10) We will leave “Automatic Storage increases” enabled so that we don’t accidentally run out of disk space.
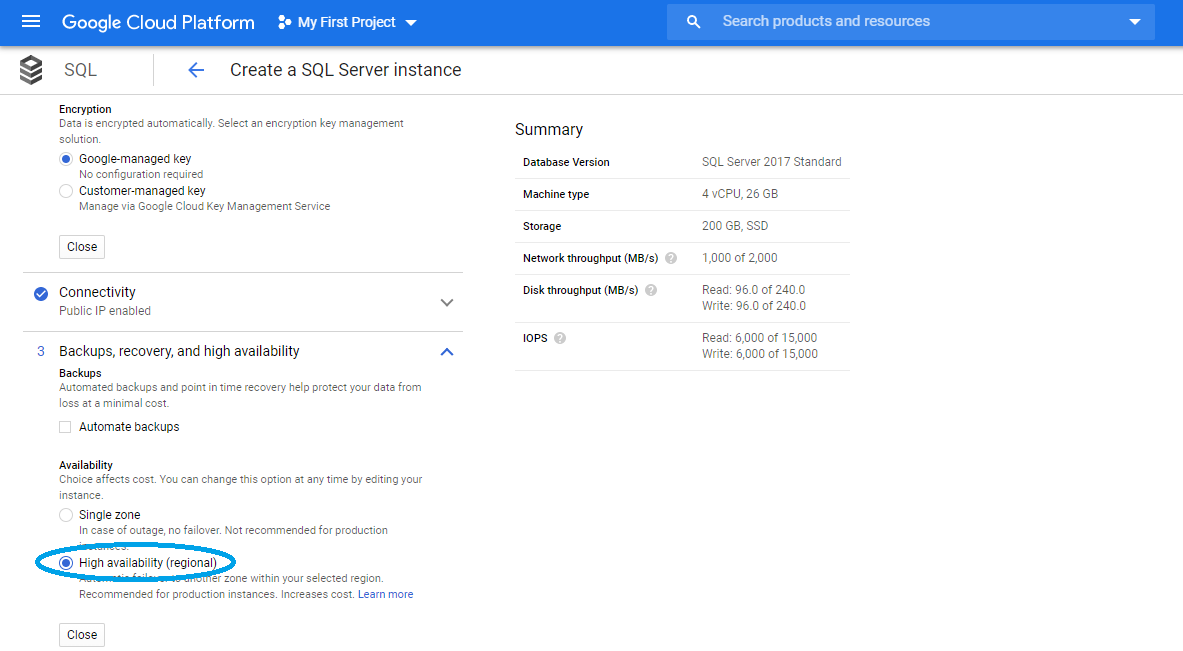
(11) Lastly, let’s ensure that the database will automatically provide isolation from failures. We can do that by enabling the high availability configuration, which for SQL Server adds a standby instance in a different zone.
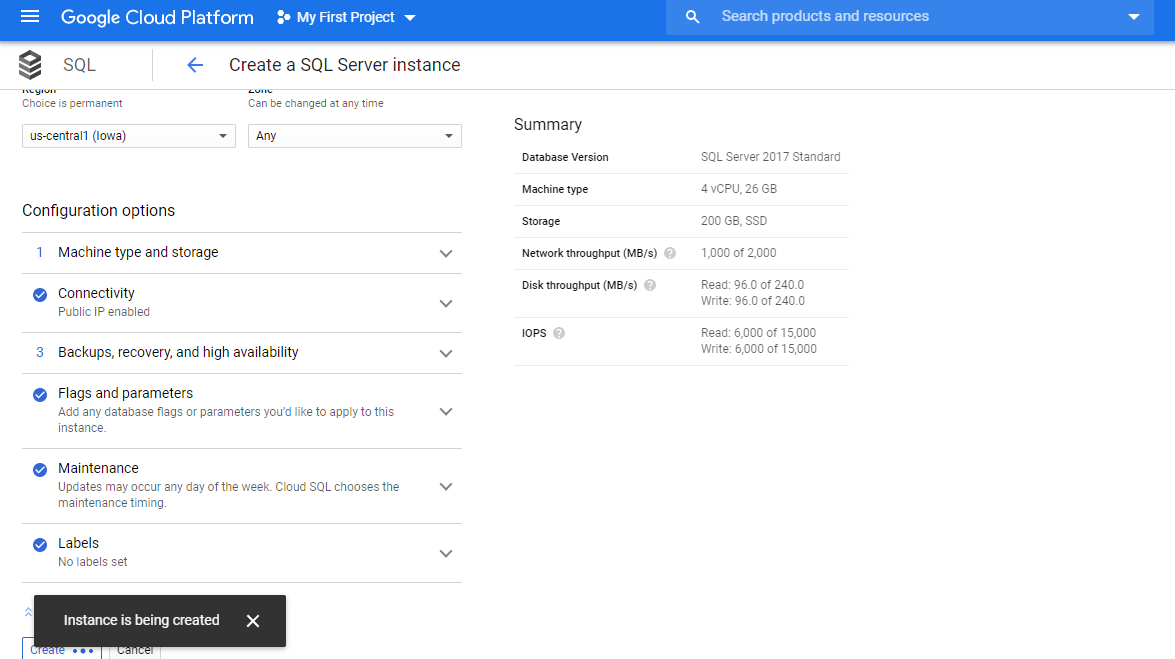
(12) Click on “Create” button to create the SQL Server instance.
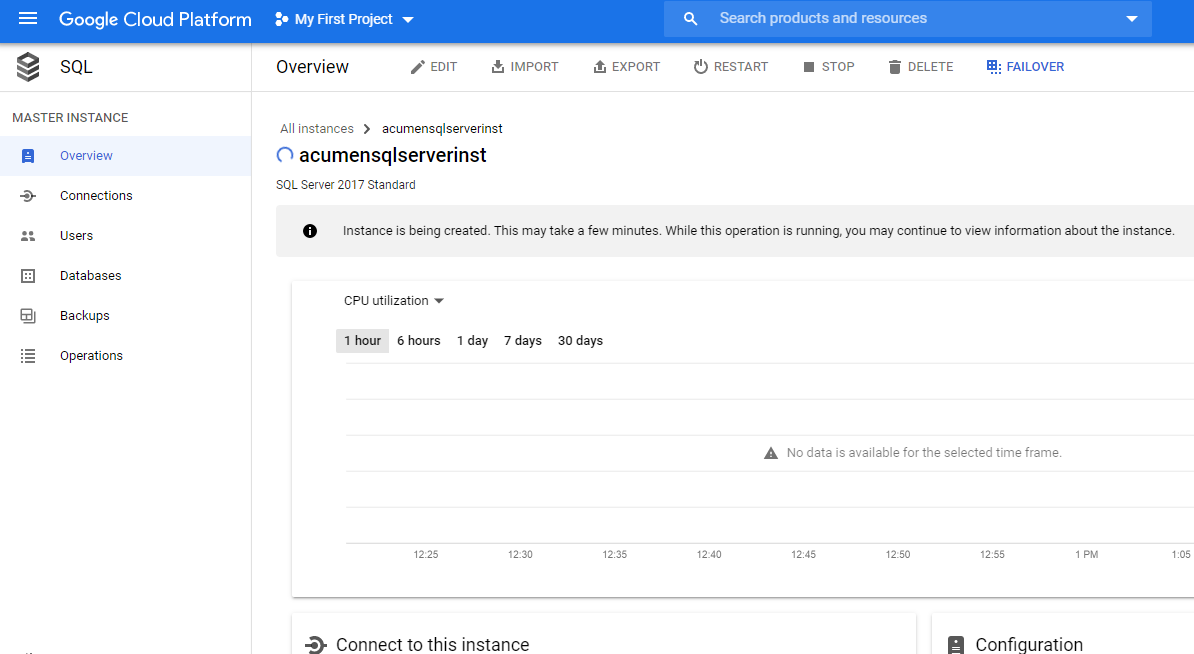
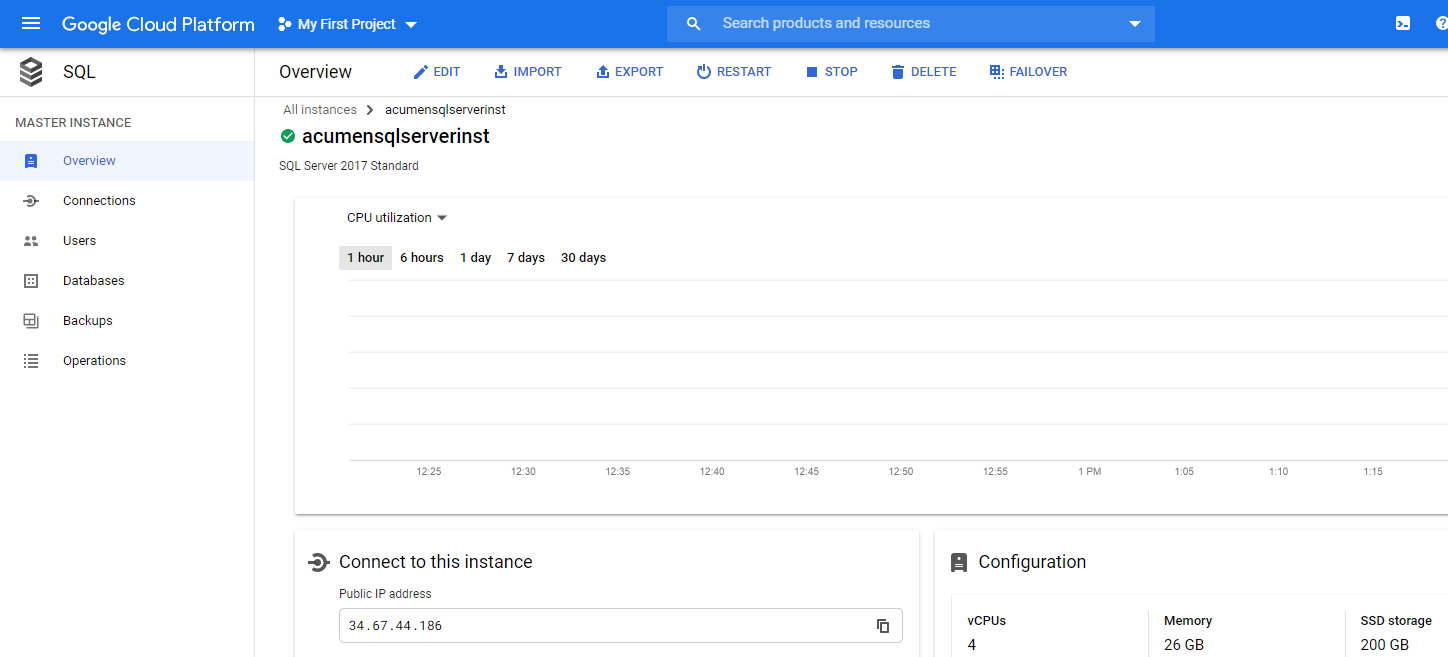
(13) On clicking of “Create” button, SQL instance gets created (It will take a few minutes) as shown below.
(14) Select “Connections” option on the left side menu.
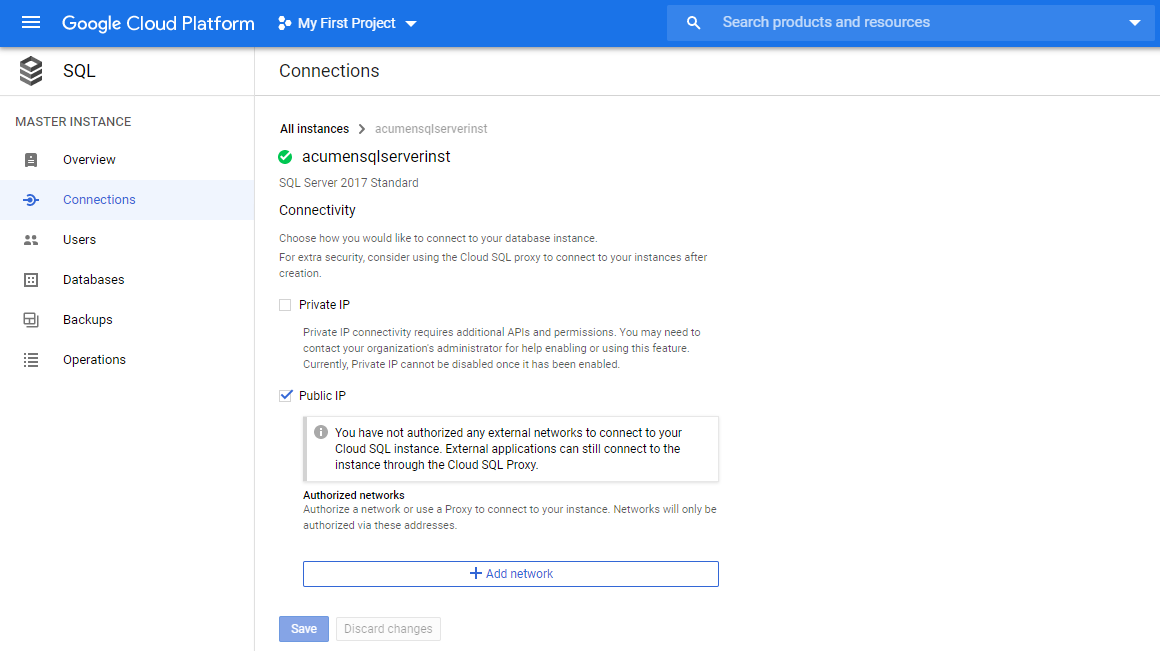
(15) Click on “Add network” button and enter the IP address of a client computer to provide SQL Server access to client computer (to create databases, tables and view the records inserted into the SQL table later, through “SQL Server Management Studio” installed on the client computer).
Note: To find the IP address of the client computer, search “what is my ip address” in Google.
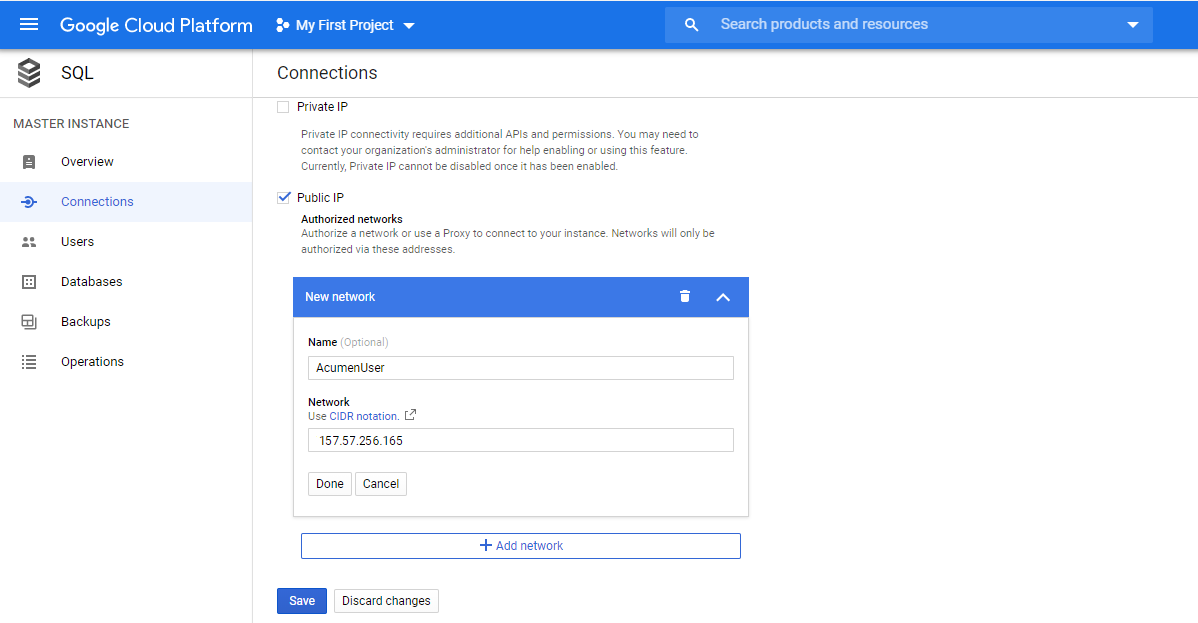
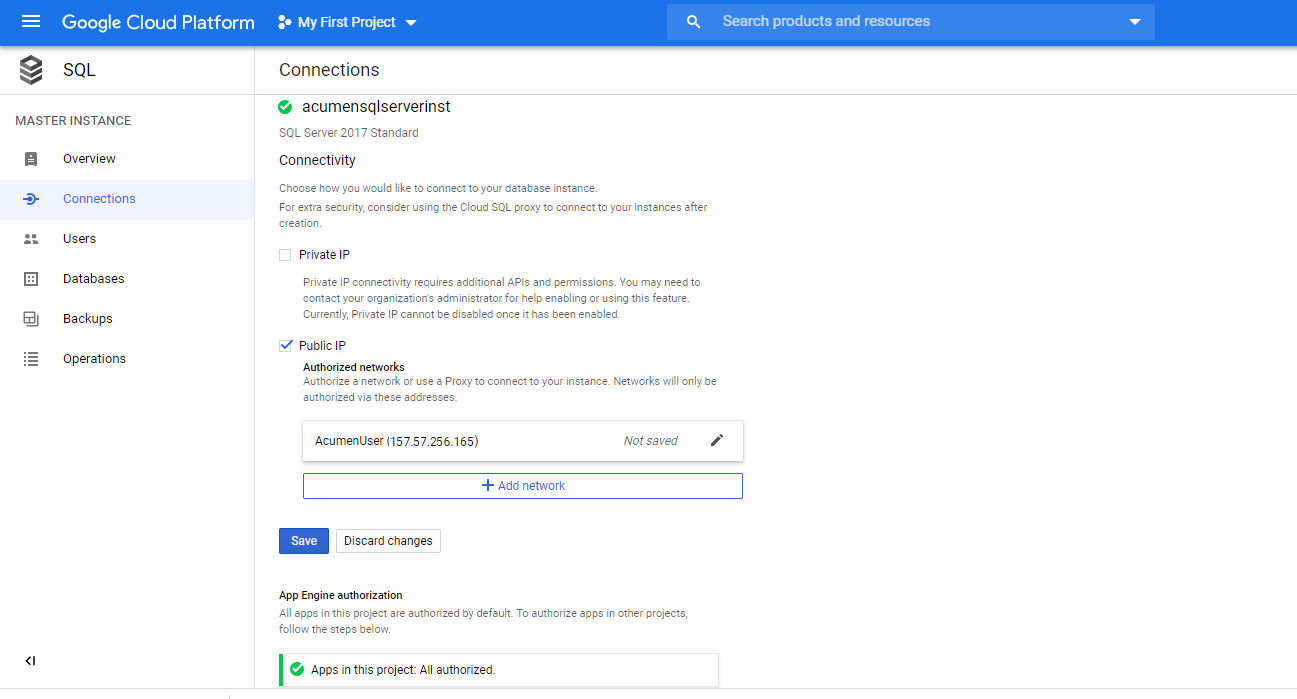
(16) Click on “Done” and then “Save” button to save the settings.
Exporting SQL Database Schema and data for migration
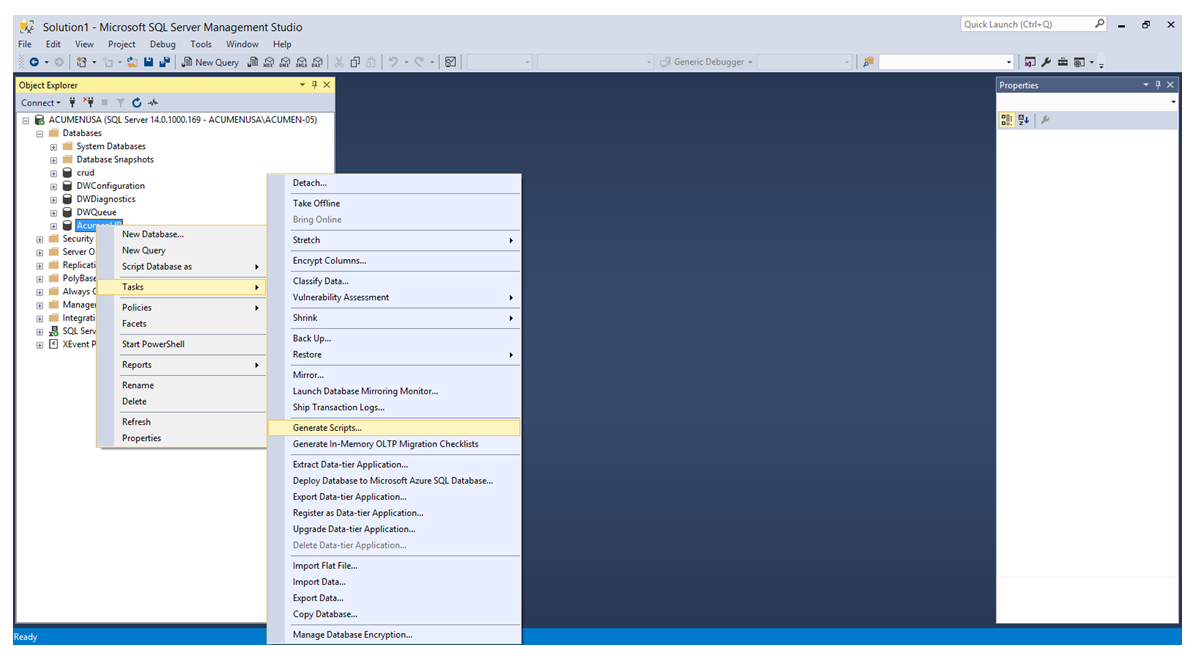
(1) Access the existing/on-premise SQL Server for which the database migration needs to be carried out using Microsoft SQL Server Management Studio. Right click on the database that needs to be migrated to Cloud SQL. Select “Tasks”>”Generate Scripts…” option as shown below.
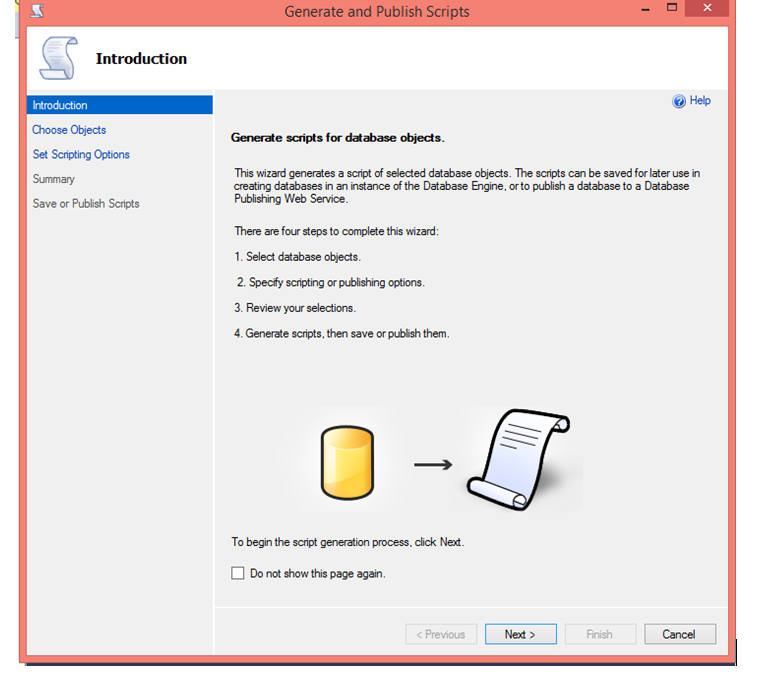
(2) An introduction dialog window opens as shown below.
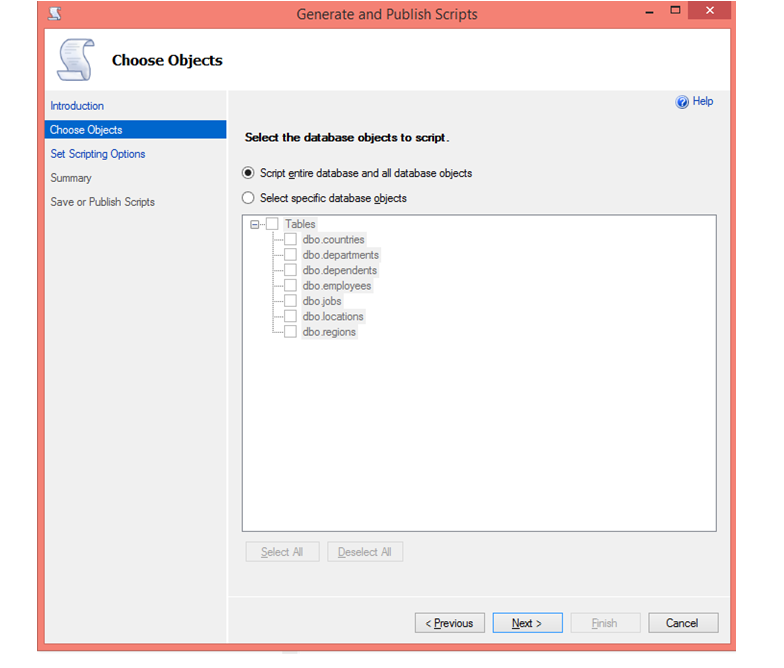
(3) On selecting “Choose Objects” on left side menu or clicking on “Next” button, a dialog window opens with the list of tables available in the selected database (AcumenHR in this case) as shown below.
(4) Select “Set Scripting options” menu on left side menu or click on “Next” button and make the settings as shown below and click on “Advanced” button on the dialog window. A child dialog window with the name “Advanced Scripting Option” opens. Set “Types of data to script” to “Schema and data” in the child window and click on “OK” button. Then click on “Next” button on parent dialog window.

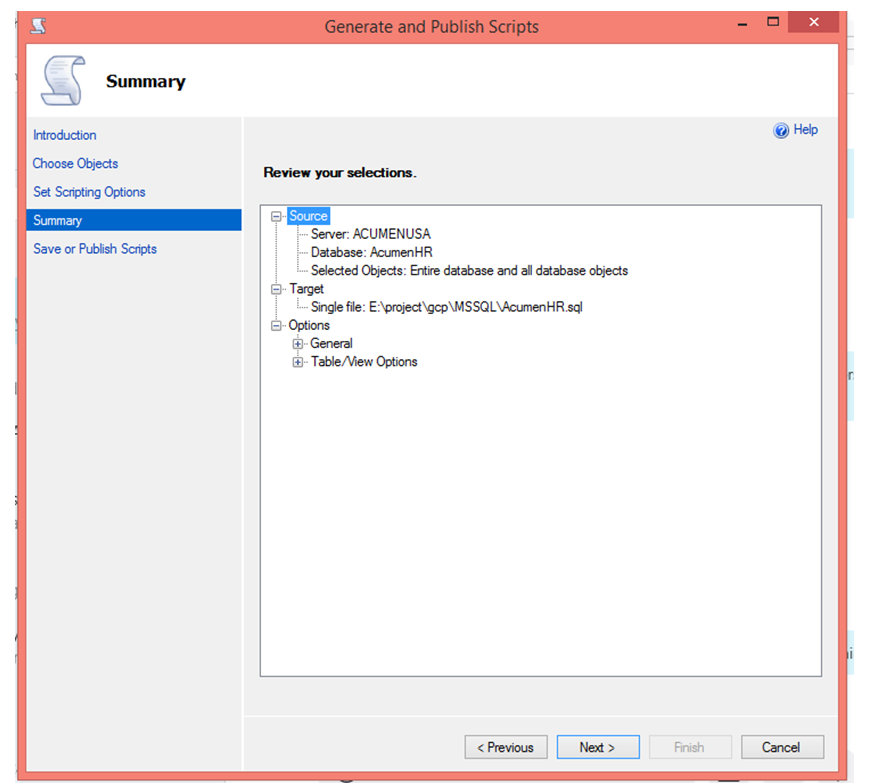
(5) A summary dialog window opens as shown below. Click “Next” button on the window.
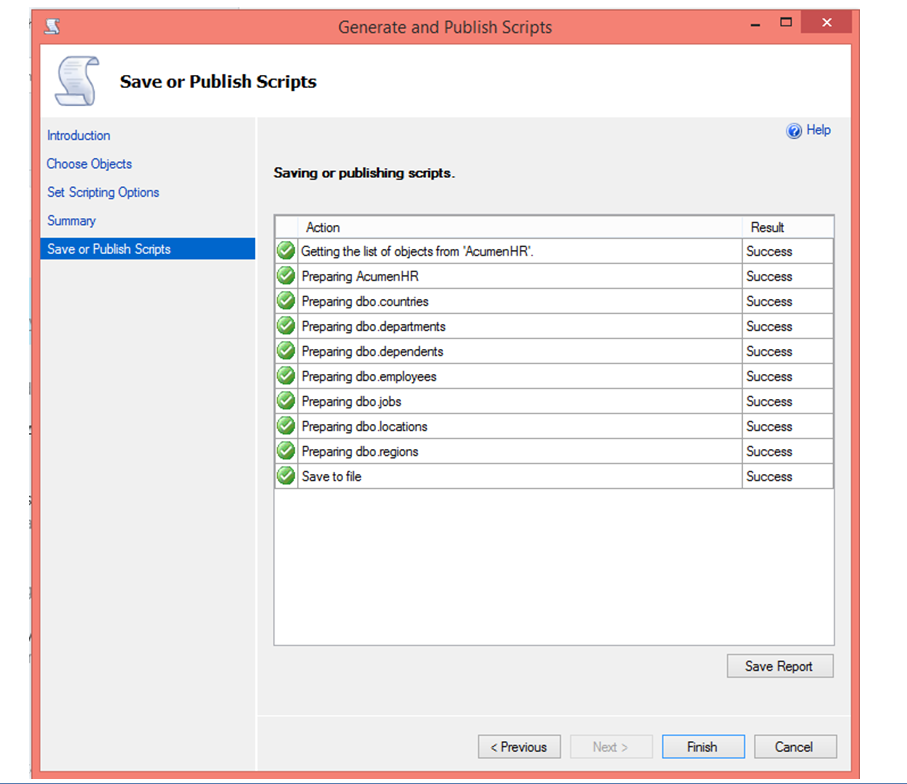
(6) A dialog window “Save or publish scripts” opens with the status of SQL script generation. Click on “Finish” button to create the SQL script file with .sql file extension in the selected folder.
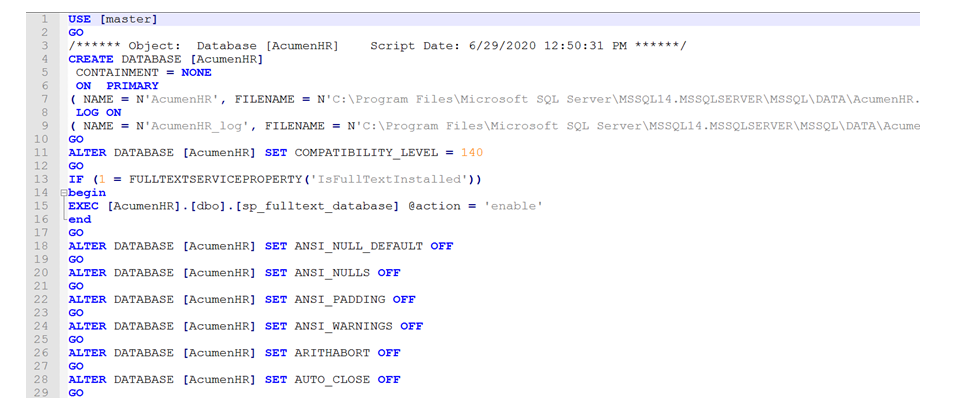
(7) A script that will be used for migration is generated with the file name “AcumenHR.sql” as shown in the snapshot below.
Creating Database in Cloud SQL’s SQL Server instance
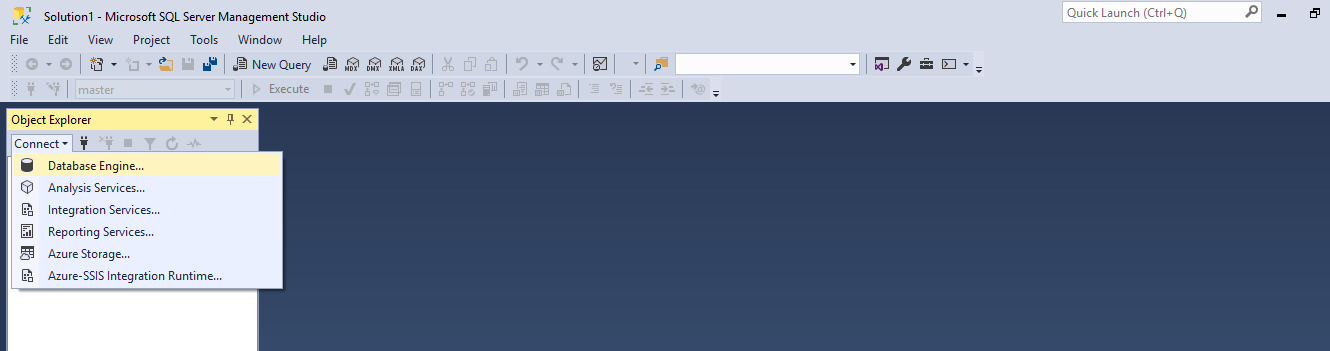
(1) Open Microsoft SQL Server Management Studio (SSMS) in the client computer for which the access has been provided previously in the SQL Server instance (acumensqlserverinst). Click on “Database Engine…” option uner “Object Explorer” window to open the server login window.
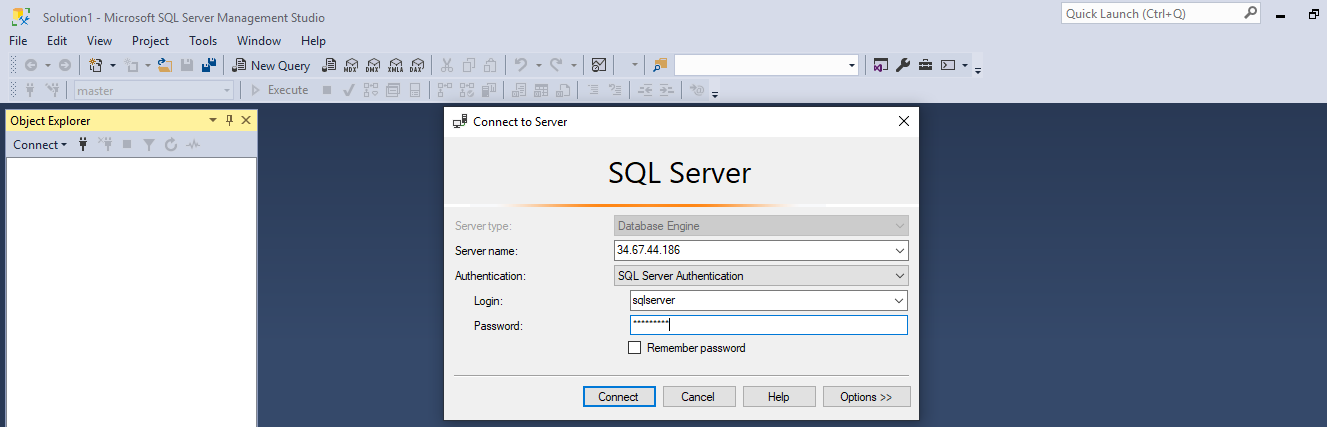
(2) Enter the public IP address of the SQL Server instance in the “Server Name” field of the login window. Enter user ID & password of the SQL Server instance. Click on “Connect” button.
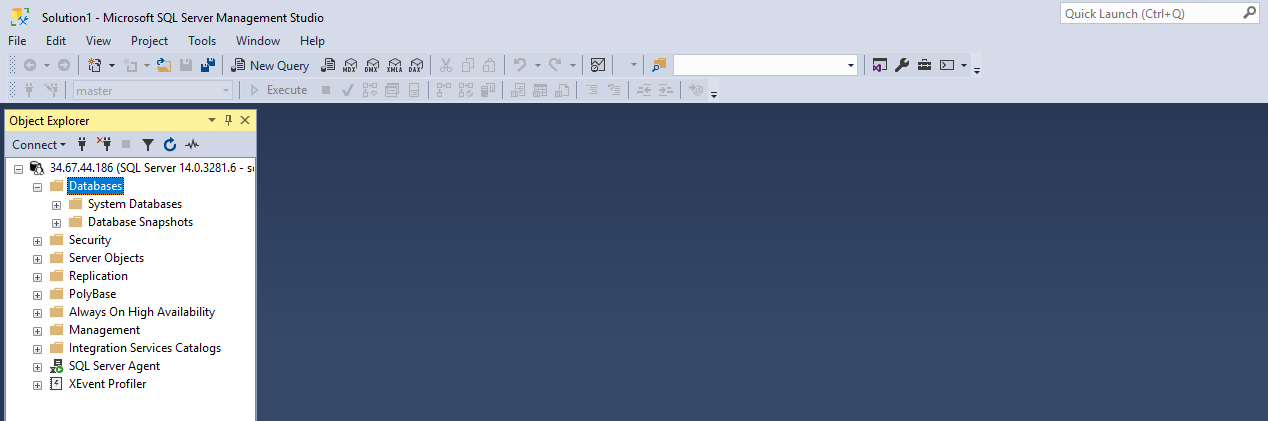
(3) The SQL Server explorer window opens as shown below.
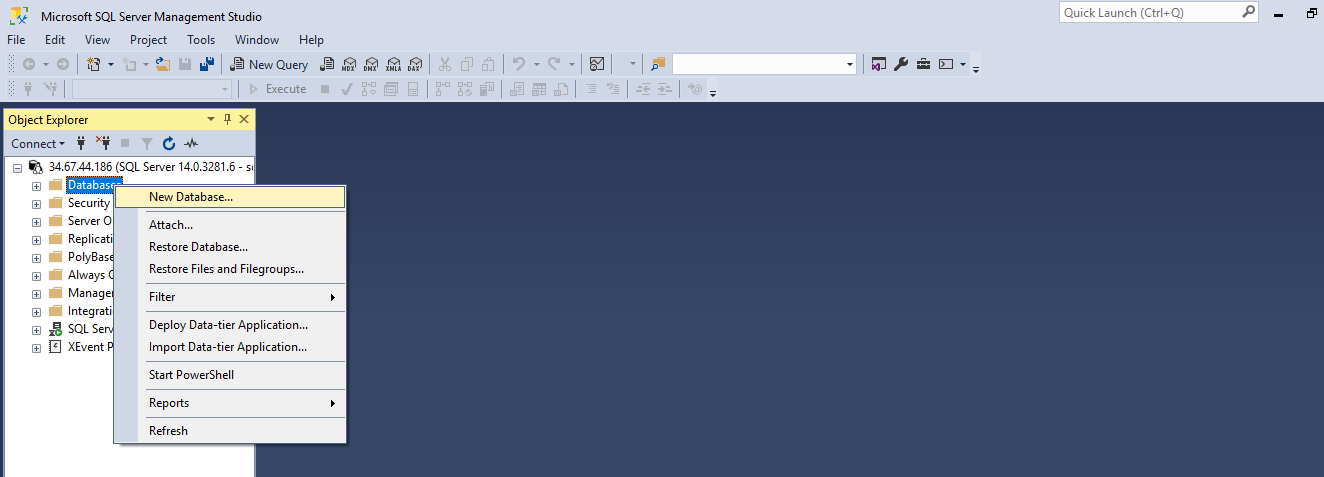
(4) Right click on “Databases” folder of the SQL Server explorer. A new menu opens with the option “New Database…”.

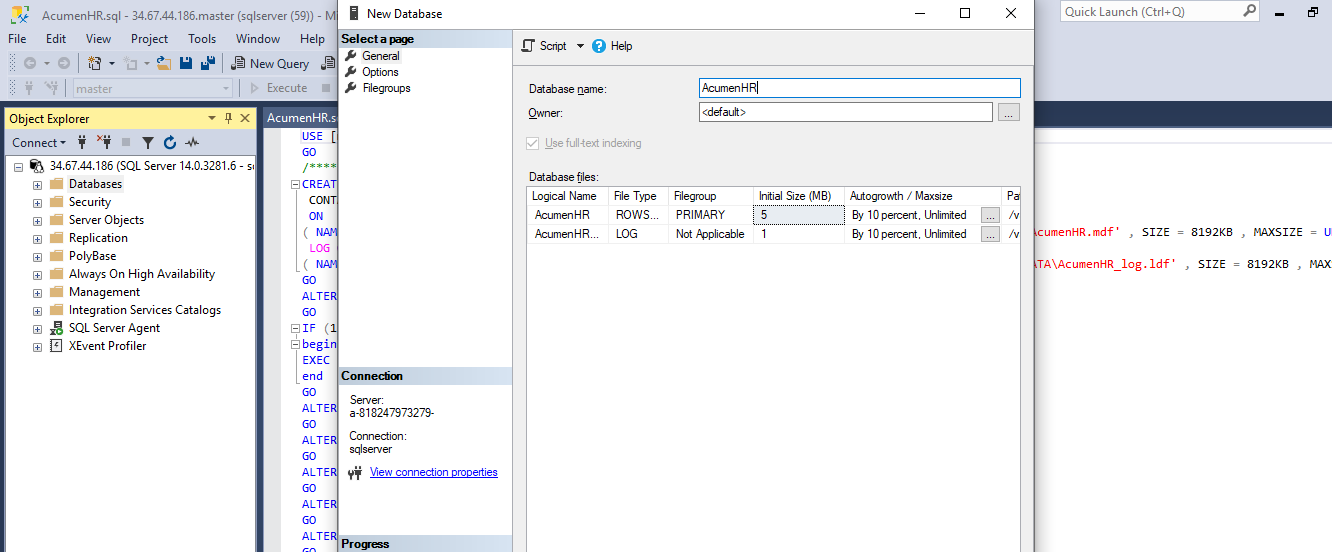
(5) On clicking of “New Database…” option, a window opens as shown below. Enter database name as “AcumenHR” in the “Database name” field and click on “OK” button.
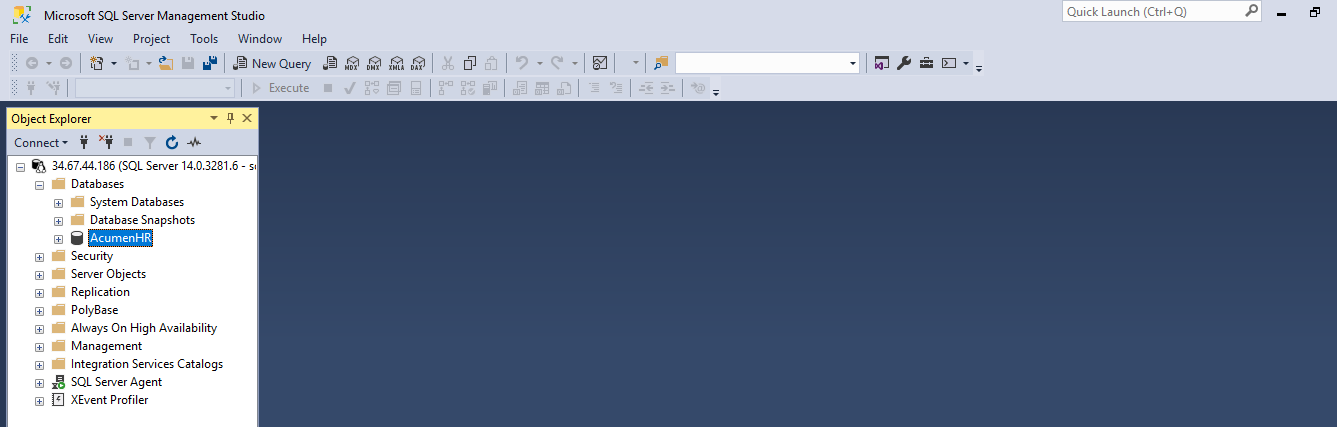
(6) Database with the name “AcumenHR” gets added under “Databases” as shown below.
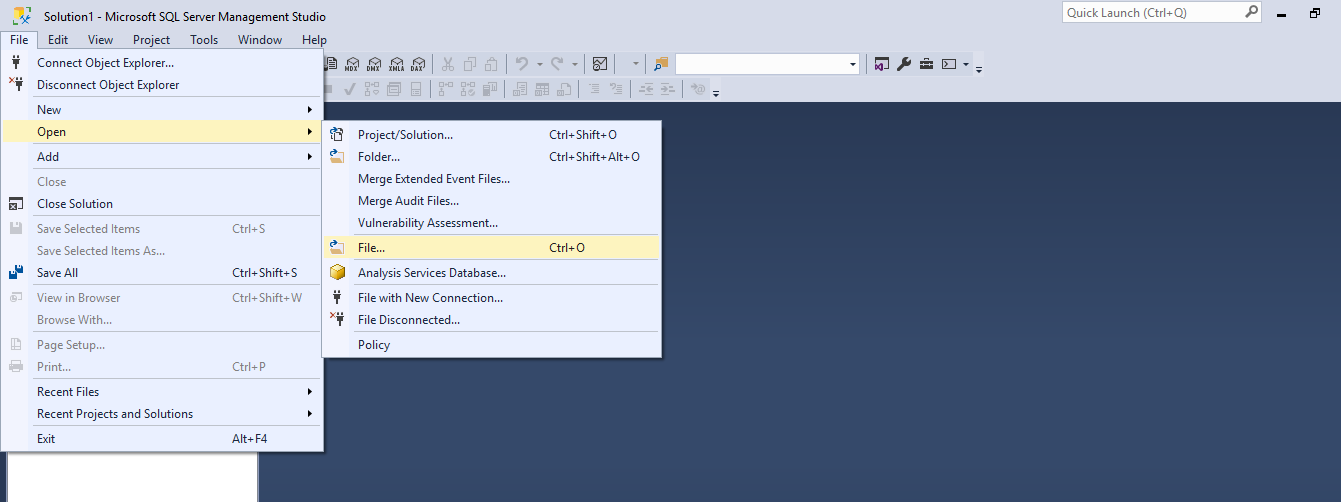
(7) Select “File”>”Open”>”File…” from the menu.
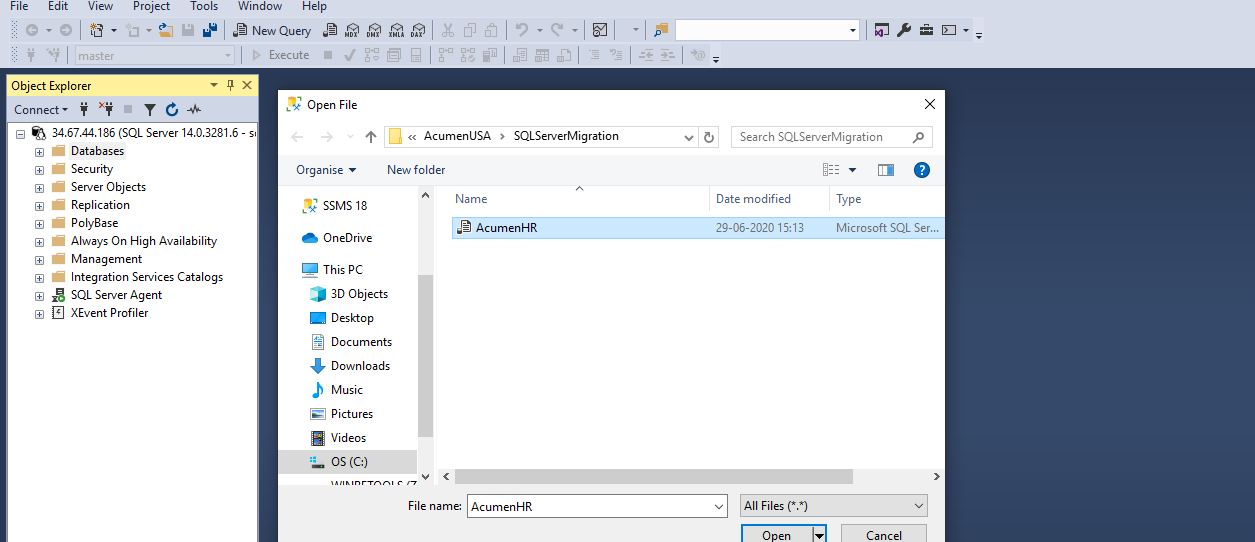
(8) Select the SQL script file “AcumenHR.sql” from the Open file window.
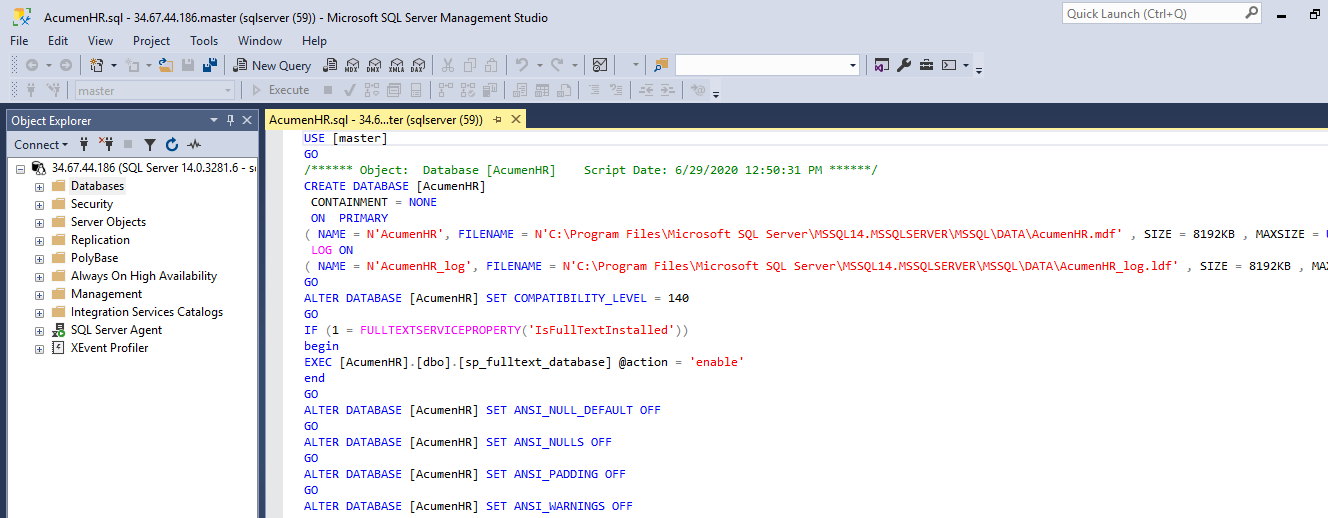
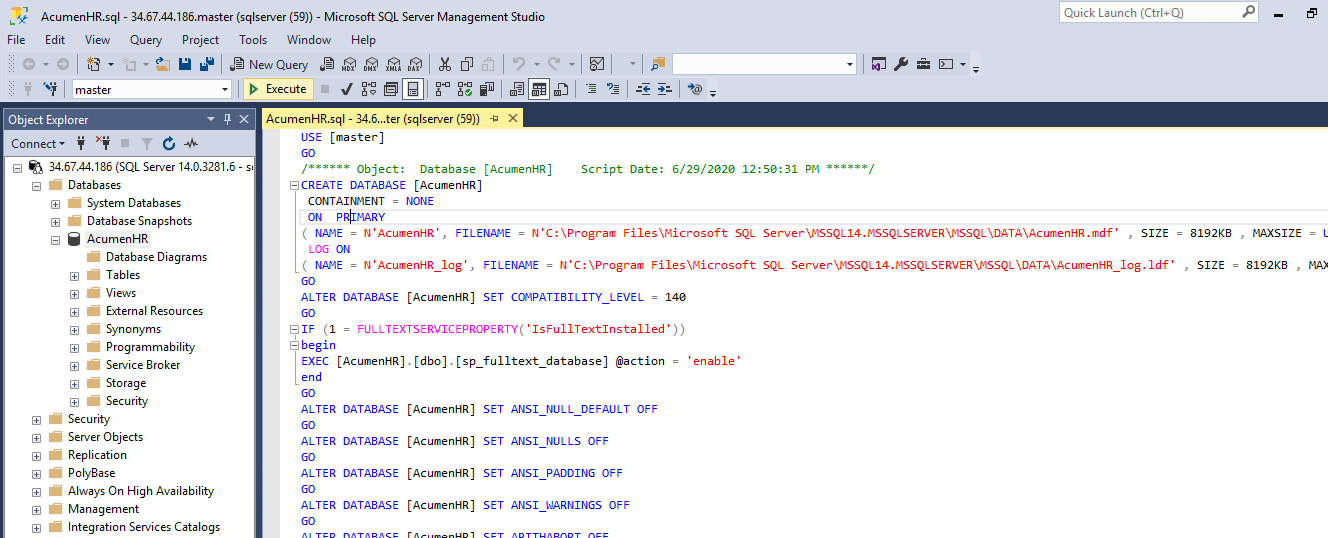
(9) AcumenHR.sql file will get opened as shown below.
(10) Click on the script window and click on “Execute” button on toolbar to run the SQL script.
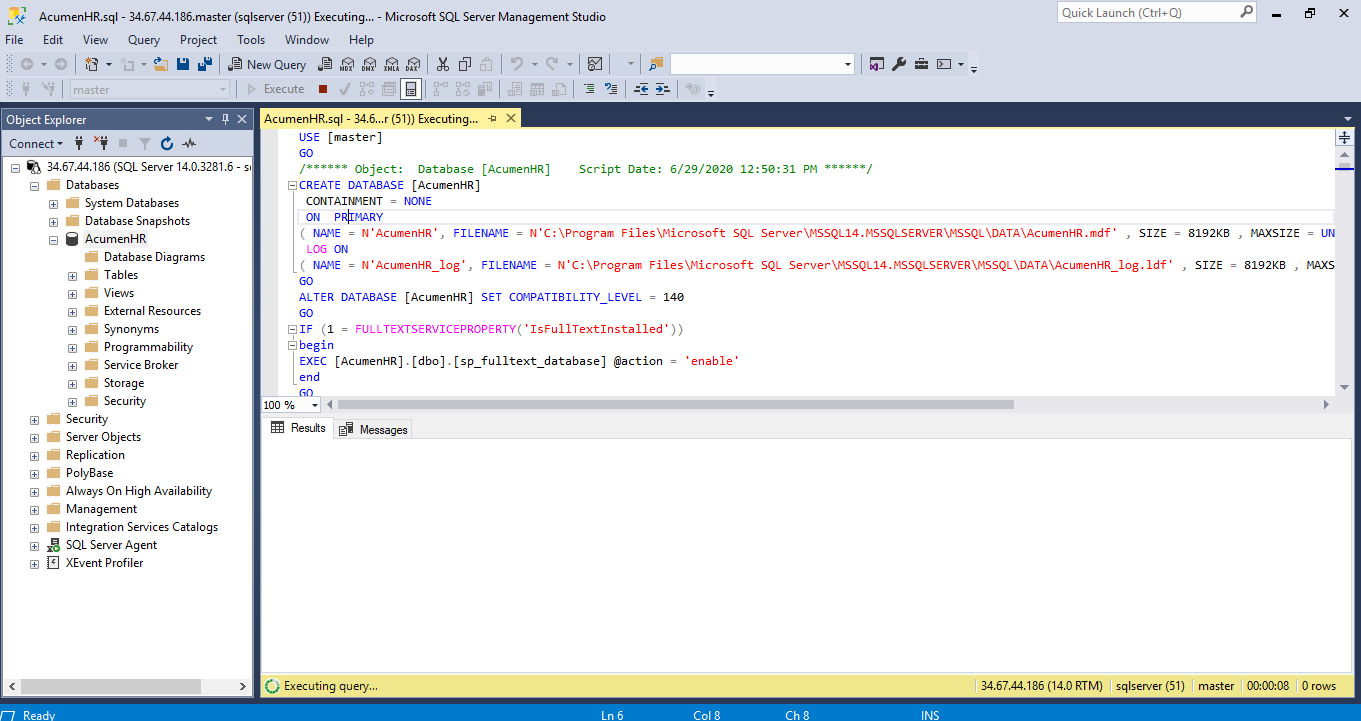
(11) After completion of the execution of the script, right click on the “Databases” on the left side of the window and select “Refresh” option.
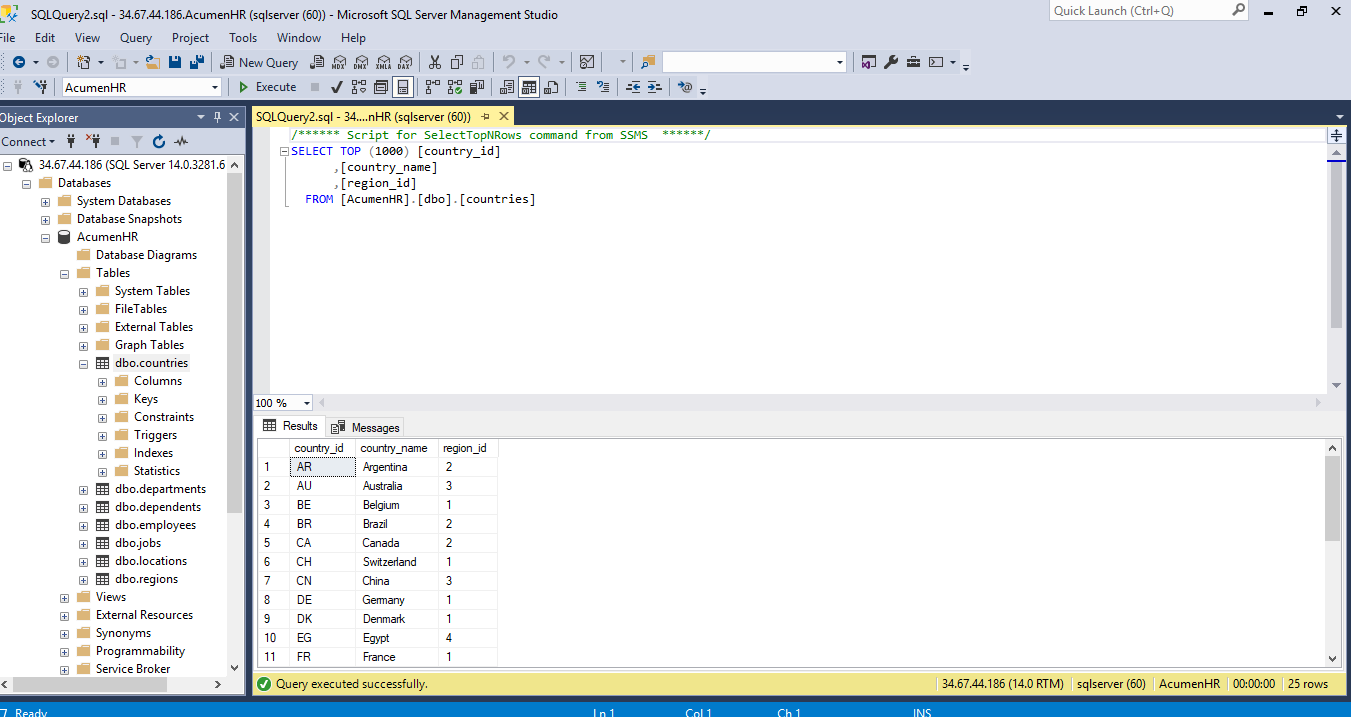
(12) You can view the tables and the data are imported to the new SQL Server as shown below.
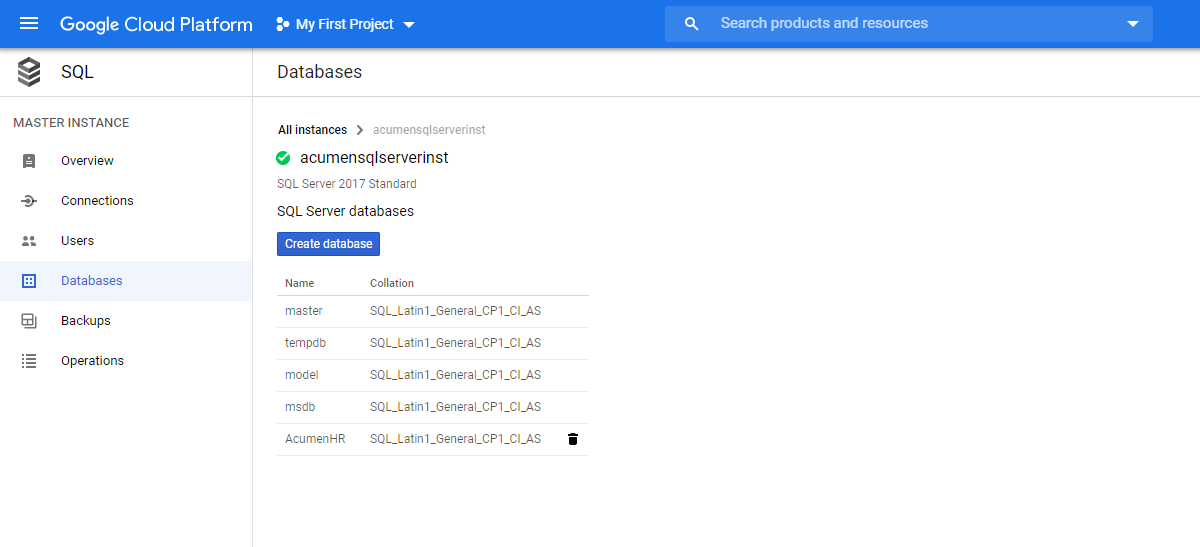
(13) Creation of new Database (AcumenHR) is also listed in GCP console.
(14) Update or add the database connection string.
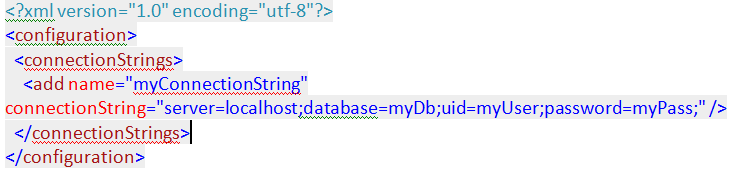
The connection string to Google Cloud SQL should look like:
Server=xxx.xxx.xxx.xxx;
Database=DB_NAME;
Uid=USER_NAME;
Password=PASSWORD;
Where xxx.xxx.xxx.xxx is the public IP address of the GCP SQL Server instance.
(15) In the application’s configuration file, modify the connection string value as indicated below
ConnectionString in .NET config file –
Do not use the appSettings section in web.config. Instead use the connectionStrings section in web.config.
To read the connection string into your code, use the ConfigurationManager class.
![]()
Remember to add a reference to the System.Configuration component.
Then include the namespace System.Configuration to get access to the ConfigurationManager class.
// C#
using System.Configuration;
// VB.Net
imports System.Configuration
Clear connection strings coming from higher level config files.
Configuration files are hierarchical, with machine.config being at the highest level. You can clear connection strings defined earlier in the hierarchy to make sure any unwanted settings don’t bubble down to your desired value.
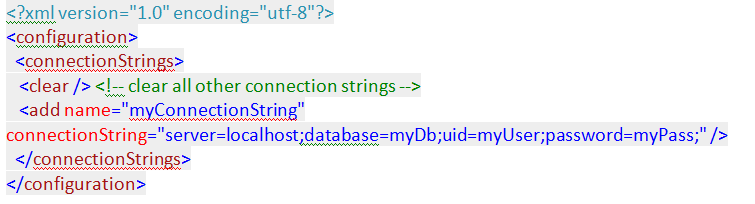
Adding <clear/> at top in the connectionStrings section is usually a good practice to make sure no other connection strings are bubbling down from a higher level configuration file.
We hope this provided you with the necessary steps to configure and migrate your Microsoft SQL Server to Google Cloud Platform. We even included how to connect your applications that use the SQL Server to Google cloud above. If you have any questions or need assistance, please feel free to contact us.